How to Combine Roof Insulation and a Roof Extension in One Integrated Renovation Project
For Dutch homeowners, the roof is more than protection against rain and wind. It plays a major role in preventing energy loss and can unlock extra living space in densely populated urban areas. With fluctuating energy prices and growing demand for home offices, a fragmented approach, insulating one year and extending the next, is outdated. The modern strategy is an integrated renovation: a single project combining high-performance roof insulation with a structural roof extension. This article explains how to execute such a project in line with Dutch building codes while achieving a continuous thermal envelope.
Why Dutch Homes Demand an Integrated Approach
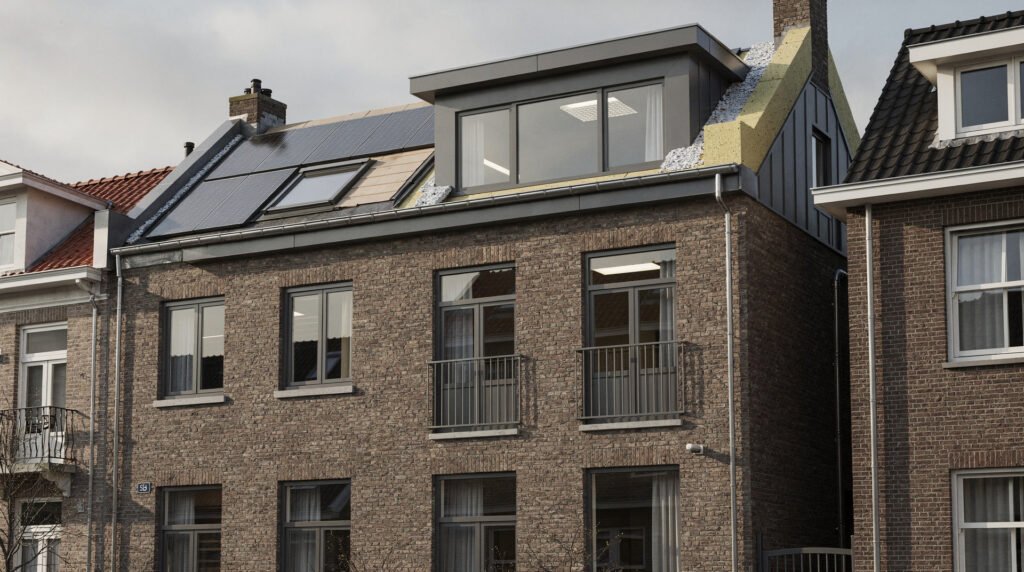
Separating a roof extension from insulation makes little sense in the Dutch climate and housing market. Much of the housing stock, particularly in cities like Amsterdam, Utrecht, and Haarlem, consists of terraced houses or 1930s-era dwellings with steep, uninsulated pitched roofs. These roofs often act as empty voids that lose heat directly into the sky. At the same time, ground space on these urban plots is fully used, leaving upward expansion as the only option. An integrated renovation addresses the space shortage and the energy performance problem in one scaffold erection. Combining the two saves on mobilization costs, prevents thermal bridges at the junction of old and new structures, and ensures the waterproofing layer is continuous. You are not just adding a box on top of your house; you are wrapping the entire volume in a thermal coat.
Understanding the Technical Symbiosis
A traditional sequential renovation often results in a “cold roof” scenario where condensation risks skyrocket. When you add a dormer to an already insulated attic, you often inadvertently create a moisture trap. An integrated approach reverses this logic. You are creating a uniform interior climate envelope. The insulation strategy must account for the warm, moist internal air of the new bedroom or office meeting the cold, ventilated exterior of the extension’s flat roof or cheek walls.
Key Dutch Building Code (Bouwbesluit) Considerations
In the Netherlands, the Bouwbesluit 2012 sets strict performance-based requirements. For thermal insulation, the key value to plan around is the Rc value (warmteweerstand). A standard renovation requires an Rc of at least 4.5 m²K/W for the roof, but when applying for an integrated extension permit (omgevingsvergunning), an Rc of 6.0 or higher is the standard for “new-build” quality sections of the extension. You cannot legally drill into the old purlins without structural calculations. The added weight of insulation and the new dormer structure requires a structural engineer to verify the capacity of the existing foundations and roof trusses. An integrated project lets you solve these structural questions as a whole, often allowing you to replace weak or rotten rafters with structural insulated panels (SIPs) that provide both strength and insulation.
Material Selection: The Battle of Climate Control
Choosing materials for a combined roof insulation and extension project means balancing thin, high-performance products against breathability. Dutch homes often have high indoor humidity from cooking, showering, and older builds lacking mechanical ventilation. Sealing that moisture into a new roof structure invites mold, so the build-up must be airtight yet vapor-open. Below is a breakdown of material strategies for a Dutch dormer or full-width extension.
Material Strategy: PIR (Polyisocyanurate) Rigid Foam
Typical Rc Value (for 140mm thickness): 6.4 m²K/W (Excellent)
Vapor Permeability: Closed cell (Vapor barrier)
Best Application in an Integrated Build: Flat roof decks of the new extension; underside of new rafters where no breathing is needed.
Material Strategy: Glass Wool (Glaswol) with Smart Membrane
Typical Rc Value (for 140mm thickness): 4.2 m²K/W (Good)
Vapor Permeability: Open (Breathable when taped)
Best Application in an Integrated Build: Pitched roof planes of the existing roof; irregular rafter spacings where foam is hard to friction-fit.
Material Strategy: Wood Fiber Boards (Houtvezel)
Typical Rc Value (for 140mm thickness): 3.7 m²K/W (Moderate/Thick)
Vapor Permeability: Excellent hygroscopic buffering
Best Application in an Integrated Build: Historic Dutch roofs where moisture management is critical; under-tile sarking boards.
Material Strategy: Resol Foam (High-Tech)
Typical Rc Value (for 140mm thickness): 7.0+ m²K/W (Premium)
Vapor Permeability: Low vapor transmission
Best Application in an Integrated Build: Thin cheek walls of a dormer where you cannot afford thick build-ups but need max performance.
Navigating the Flat Roof of Your Extension
A typical Dutch roof extension has a flat roof (plat dak) clad in EPDM or bitumen, and this is the thermally weakest part of the volume. A flat roof has no ventilation cavity like a sloped tile roof, so the insulation must be waterproof and vapor-tight. Use the “warm roof” construction: insulation laid directly on top of the structural sheathing. Avoid the “cold roof” (ventilated) build-up in integrated projects, as it invites rot. Use PIR boards with a factory-applied bituminous top layer, adhered to the OSB decking with a full-bed PVC adhesive. This method is gaining popularity among Dutch contractors because it removes mechanical fasteners that create thermal bridges. Overlap the PIR joints and seal them immediately with the EPDM membrane, leaving no leakage path between the 30-year-old main roof and the new extension roof.
Synchronizing the Scaffolding and Sequencing
The logistical brilliance of an integrated renovation is revealed in the construction sequence. You cannot strip tiles and then decide to build a dormer next month; the weatherproofing must be sealed within a short window. The recommended workflow for a Dutch terraced house involves these critical integrated steps:
- Full Roof Removal: Strip the existing roof tiles, battens, and old felt down to the bare rafters of the entire roof plane affected. Do not limit stripping to just the extension zone; this creates a dangerous patchwork of new and old underlay that will buckle.
- Structural Retrofit: A carpenter installs the new supporting beams, vertical dormer posts (stijlen), and the flat roof joists of the extension. Simultaneously, the spacing between the existing rafters is measured for insulation compression fit.
- Continuous Underlay Installation: A high-water-resistance but vapor-open membrane (like Tyvek® or Corotop) is draped continuously from the base of the old eaves all the way up and over the cheek walls of the new dormer.
- Gap-Free Insulation Layer: Soft glass wool is friction-fitted between the rafters of the old pitched section, cut precisely to prevent slumping. At the same time, rigid PIR boards cut on-site are glued and friction-fitted into the dormer frame walls. The junction where the pitched roof meets the vertical cheek wall is the “kill zone” for thermal bridges, so expanding foam sealant is injected there to close any micro-gaps.
- Internal Air Tightness Barrier: A dedicated damp-proof membrane is stapled over the inside face of the rafters and the dormer cheeks, with all overlaps taped rigorously using Tescon Vana tape, especially where the existing ceiling meets the new extension geometry.
- Cladding Unification: Finally, the tiles on the pitched section and the zinc or bitumen cladding on the dormer cheeks are installed, ensuring the lead flashing (loodslabben) bridges the new extension seal perfectly over the intersecting insulation levels.
Airtightness: The Knap Detail That Defines Success
Dutch construction regulations increasingly center on the EPC (Energy Performance Coefficient) and BENG (Bijna Energieneutrale Gebouwen) standards. An extension must not make the existing house perform worse. Roof insulation without airtightness is a wasted investment: air leaking through a recessed spot downlight in a new dormer ceiling carries moisture-laden air into the cold roof build-up. In an integrated project, the airtight line must be planned precisely. Picture a red pencil line on your cross-section drawing that must never have a gap. It runs down the existing inner wall plaster, bends horizontally across the new dormer ceiling rafters, continues down the dormer knee wall, and joins the floor insulation layer below. To verify this, Dutch homeowners should specify a blower door test (luchtdichtheidsmeting) for the entire top floor before the finishing plasterboard is sealed. The test pressurizes the house and pinpoints leakage paths where the old fabric meets the new structure. Sealing these leaks with flexible sealant before plastering is the only way to ensure the integrated thermal envelope performs to Rc 6.0 standards.
Structural Reinforcements Concealed in the Insulation Zone
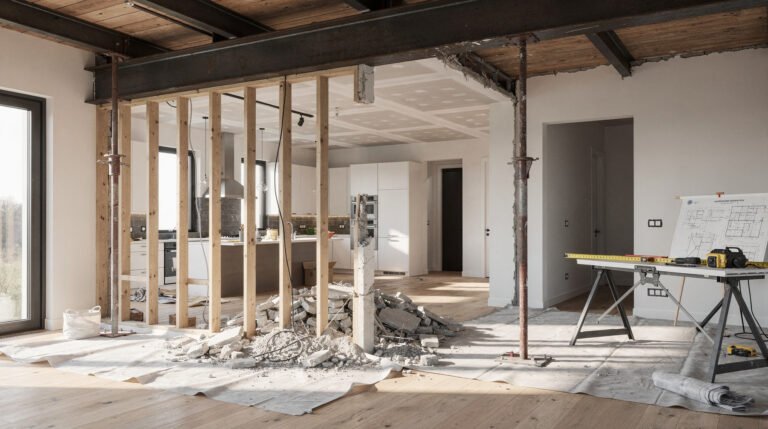
An aesthetic advantage of the integrated approach is hiding steelwork. A large open-plan dormer over a Dutch “zolder” often requires steel I-beams (stalen liggers) to transfer the new flat roof load away from the narrow cavity walls. In a non-integrated job, these cold steel beams sit exposed in the room or are boxed in with cosmetic plaster, creating a massive cold bridge and condensation drip line. In an integrated project, the structural engineer collaborates with the insulation advisor to encapsulate these beams. A steel beam resting on a load-bearing wall can be wrapped entirely in aerogel insulation blankets before the plasterboard is applied. Aerogel is expensive but essential here because it achieves a high thermal break in mere millimeters, preventing the beam from becoming an internal gutter for condensate during a cold February night in Groningen. You simultaneously carry the load of the new roof and break the thermal bridge in one coordinated trade lift.
Navigating Permit Requirements for Integrated Work
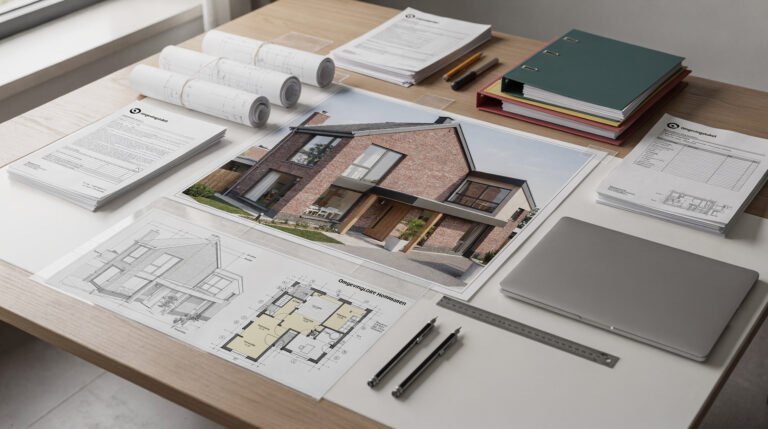
Dutch municipalities (gemeentes) process the Omgevingsvergunning based on the final visual mass and structural safety. When submitting your drawings, do not just show the aesthetic elevation of the dormer. Include a detailed principle detail (Bouwfysisch principe detail) drawing for the permit reviewer. This detail should show the Rc calculation breakdown for the complete sliced wall and roof build-up. Municipalities are increasingly checking thermal performance under the “Duurzaam bouwen” policy. If you show an Rc of 2.5 from the 1970s in the existing section and an Rc of 6.0 in the new section meeting clearly with a thermal bridge analysis, your permit process is often smoother. The inspector recognizes that no safety hazard exists from internal condensation. Prior neighbors’ notification (burenrecht) is also smoother when you can prove the extension will not cause structural overload because you are removing heavy old tiles and replacing them with lightweight energy-efficiency systems.
Execution Phase: Integrating Ventilation Ducts Inside the Thermal Wrap
A major oversight in standalone extensions is the retroactive installation of mechanical ventilation ducting. The Building Decree requires ventilation via a MVHR (Mechanische Ventilatie met Warmteterugwinning) system or dMEV units in new habitable rooms. Cutting holes through a finished dormer roof for these ducts later destroys the insulation credibility. In an integrated project, the spiral-wound metal ducts for the ventilation system are run inside the new insulated service cavity. A standard practice now is to install 22mm thick wooden counter-battens vertically on the inside of the rafters after the primary 140mm insulation and airtight membrane are fitted. This thin void houses the electrical conduits and ventilation ducts before the final plasterboard layer. By keeping these services inside the thermal envelope, you prevent the ductwork from sweating with condensation in the winter. You must route the extraction ducts from the new bathroom dormer through this baffle zone and up to the roof terminal before the tiles and flashing are sealed. If the duct exits through the flat roof, use a pre-formed PIR curb around the penetration to maintain the thermal barrier without cutting thermally broken holes later.
Financial Logic and Subsidy Awareness
Separate projects incur double mobilization costs: you pay twice for scaffolding, skip hire, and waste disposal. Integrated roof renovation also qualifies for the Dutch ISDE (Investeringssubsidie duurzame energie en energiebesparing) subsidy. You cannot claim it for the extension volume itself, since that counts as new build, but you can claim it for insulation installed in the existing renovated roof area. The calculation must separate the square meters of insulated roof connecting to the existing house from the new build cheek walls. If the qualifying area measures at least 20 m² with Rc ≥ 3.5 and is reported separately to the RVO (Rijksdienst voor Ondernemend Nederland), a substantial rebate flows back into the project budget. Dutch banks also increasingly offer mortgage packages for energy measures bundled with extensions, because the combined energy label jump (from G to A++) raises the asset value. The loan is secured not only against the added spatial volume but against the 30-year operating cost reduction of the sealed thermal envelope.
Final Quality Control: The Infrared Camera Scan
Do not pay the final contractor invoice simply by visual inspection of the painted dormer. Demand a thermal imaging scan (warmtebeeldscan) during the first winter after completion. A certified thermographer observes the external facade under stable temperature differences. In an integrated project, the scan must demonstrate uniform color on the external render of the dormer cheek and the tile face. Blotchy yellow-and-purple regions indicate missing insulation batts or slumping glass wool. The weakest point is predictably the junction where the new flat roof meets the old pitched roof structure. If the scan shows a bright yellow stripe along this seam, the insulation has slumped within the vaulted ceiling void. Because you worked integratedly, the fix requires removing only the local plaster section at the seam and injecting open-cell foam, rather than stripping the entire roof. The integrated design provides accessible zoning for post-occupancy snagging, ensuring your Dutch home reaches the coveted A+++ energy label without the scars of sequential, uncoordinated renovations.
Conclusion
An integrated roof insulation and extension project in the Netherlands works only if the thermal shell and the structural shell are treated as one. The roof must act as a continuous thermal boundary running from the existing eaves to the new dormer peak. That requires the structural carpenter, insulation installer, roofer, and air-sealing engineer to work within a single scaffolding setup. By maintaining a continuous vapor-control layer, choosing PIR for flat sections and breathable glass wool for sloped tile sections, encapsulating structural steel in aerogel blankets, and planning all service penetrations within the thermal baffle, you create a continuous heat shield. The benefits are immediate: a comfortable home office or master suite with low heating costs, no condensation-induced rafter rot because the dew point sits safely outward, and a higher property value driven by the improved BENG energy certificate. Insulate once, extend once, scaffold once: that is the logic of efficient building in the modern Dutch urban context.