Removing a Load-Bearing Wall During Renovation: Scope, Risks and Sequencing
Open-plan living has become one of the most desired features in Dutch homes. Removing a wall that separates the kitchen from the living room instantly creates a sense of space, light, and social connection. But when that wall is load-bearing, the project transforms from a simple cosmetic change into a major structural renovation. Understanding exactly what you are dealing with, how to plan the demolition, and in which order to proceed is critical to keeping your home safe and your renovation on track. This article walks you through every phase—from the first suspicion that a wall might be structural to the final coat of paint—with special attention to the rules, risks, and common practices in the Netherlands.
What Makes a Wall Load-Bearing?
A load-bearing wall transmits the weight of the floors, roof, and sometimes even the walls above it down to the foundation. In Dutch construction, these walls are often part of the original structural skeleton of the house. Identifying them is the first and most vital step. Look for the following signs, but remember that only a certified structural engineer can give you certainty.
- Orientation: Walls that run perpendicular to the floor joists are almost always load-bearing. In many rijtjeshuizen (terraced houses) built before 1970, the long walls along the party line carry the floor beams, while the internal transverse walls are frequently load-bearing as well.
- Wall thickness: Solid brick, concrete, or thick sand-lime brick walls of 100 mm or more are suspicious. In jaren ’30 homes, interior structural walls can be a full 220 mm thick.
- Continuity over floors: A wall that sits directly above a similar wall on the ground floor, or directly above a foundation beam in the crawl space, almost certainly bears loads.
- Materials: Load-bearing walls in the Netherlands are commonly made of brick, concrete, or calcium silicate blocks. Light metal-stud walls with plasterboard are never load-bearing.
Mistaking a load-bearing wall for a non-structural partition can lead to sagging floors, cracked ceilings, or even a partial collapse. Always treat any wall that you are unsure about as structural until a professional confirms otherwise.
The Legal and Safety Framework in the Netherlands
Removing a load-bearing wall is a structural alteration that legally requires an omgevingsvergunning (all-in-one permit for physical living environment) in virtually all municipalities. Even if you are only planning an internal change, the Dutch Building Decree (Bouwbesluit 2012) demands that the structural safety of the building is guaranteed. This means you must submit a permit application supported by structural calculations. A registered engineer (constructeur) calculates the loads and specifies the steel beam or lintel that will replace the wall.
| Requirement | Description | Timeframe |
|---|---|---|
| Structural calculation | Mandatory report from a qualified constructeur, showing the beam dimensions, support details, and load assumptions according to Eurocode. | 1–2 weeks |
| Permit application (omgevingsvergunning) | Application via the municipal portal, including drawings and the calculation. An architectural drawing of the existing and new situation is often required. | 8–12 weeks decision period |
| Approval and permit | Once granted, construction may begin. Display the permit on site. | — |
| Legacy notification | For small, simple interventions some municipalities accept a ‘melding’ instead of a full permit, but a constructeur’s report is always needed. | Check with your gemeente |
Never start demolition without the approved permit. Municipalities actively enforce these rules, and an unauthorized structural change can result in a forced restoration order, fines, and serious problems when selling the house.
Step-by-Step Sequencing for a Successful Removal
Sequencing is everything. Jumping ahead to the exciting demolition stage without proper preparation is the most common cause of avoidable damage and delays. Follow this order meticulously.
1. Engage a structural engineer at the start
Before you even think about a sledgehammer, book a site visit from a constructeur. They will measure, inspect the floor and foundation structure, and determine the exact loads. This is the moment to discuss your desire for a completely open space versus a smaller opening. Based on their calculations, you will receive a detailed specification for the steel beam (often an HEA or IPE profile), the concrete support pads, and any required reinforcements to the foundation.
2. Apply for the permits based on the engineer’s design
Use the engineer’s calculation as the core of your permit application. Simultaneously, notify your neighbours and, if you live in an apartment building, the VvE (owners’ association). Some VvE regulations may require additional approval even if the wall is internal. For a tussenwoning (mid-terrace house), removing a load-bearing wall adjacent to the party wall demands extra care because the neighbour’s structure often rests on the same party wall. In such cases, a constructeur will likely need to check the neighbour’s side as well.
3. Prepare the site and install temporary supports
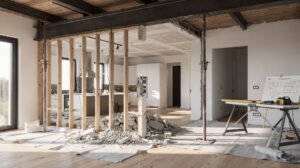
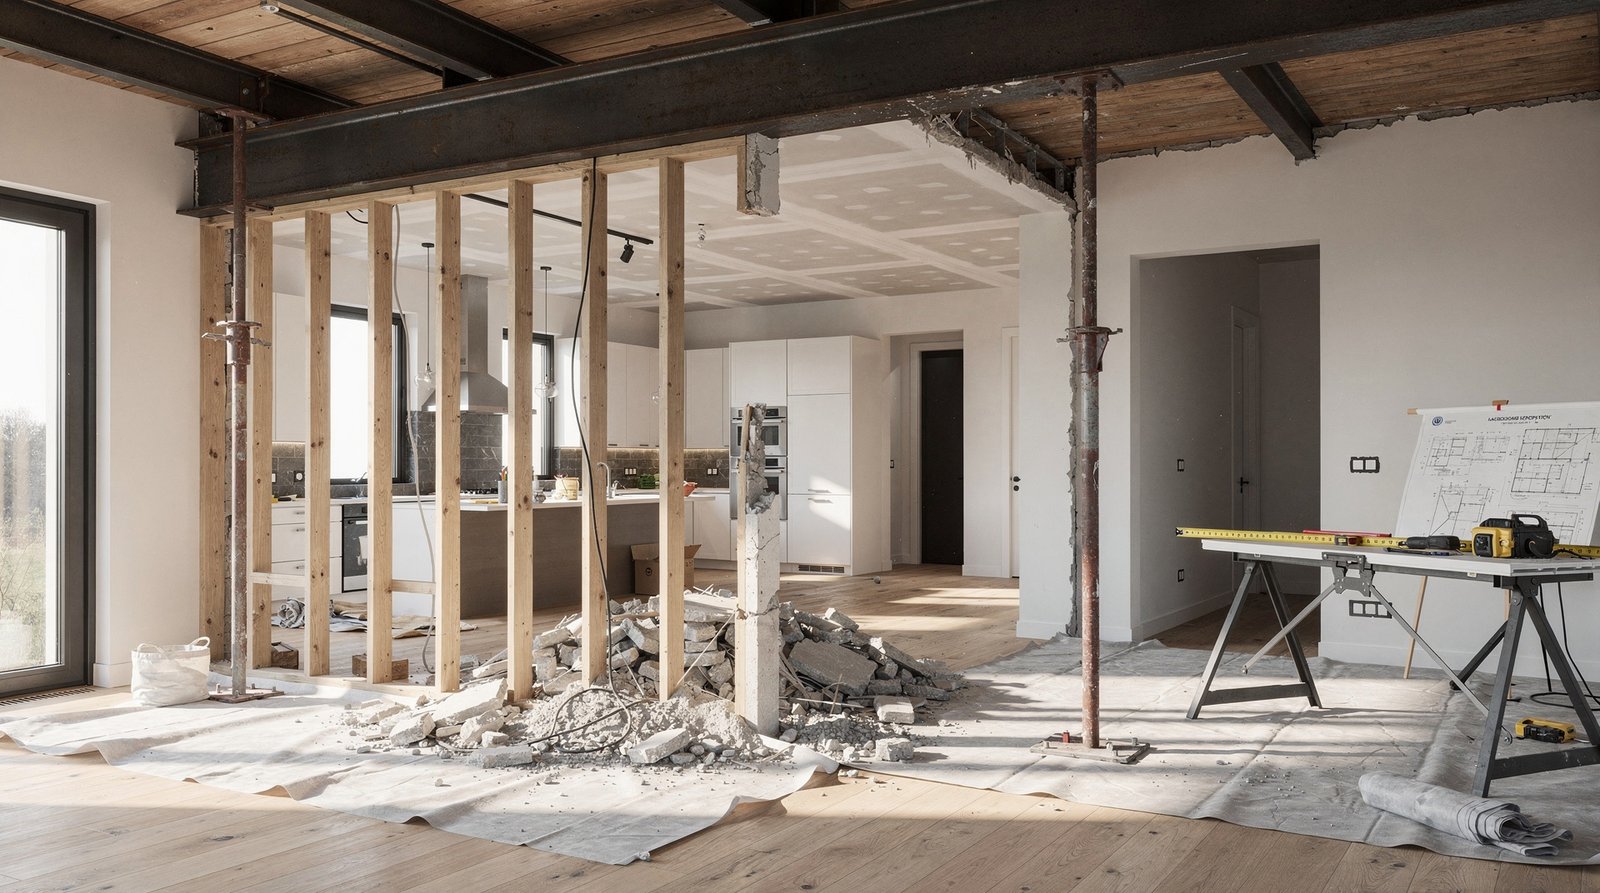
Once the permit is granted, clear the room completely. Cover floors and seal doors to adjacent rooms because dust will be significant. The first physical step is installing temporary props (stempels) on both sides of the wall. Use adjustable steel props with timber sole plates to spread the load on the floor. The engineer will have indicated the required number and spacing of props. If the wall extends over two storeys, you need to support the floors above as well. This is a job for a professional renovation team; never improvise with household poles or scaffolding components.
4. Demolish the load-bearing wall in sections
Begin from the top, working down in horizontal strips of about half a metre. Use a heavy-duty demolition hammer, but avoid hitting the supporting props. Protect the floor from falling debris with plywood sheets. When the wall reaches the line of the new beam, stop. The ends of the new beam need solid support. Cut pockets (slots) into the abutting walls or columns to a depth specified by the engineer, usually at least 150 mm into solid brickwork or concrete. Clean the pocket thoroughly and ensure the bearing surface is level.
5. Install the steel beam and complete the connection
Lift the beam into place – usually with a manual chain hoist or a small crane through a window opening. Place it on the prepared bearing pads (often pre-cast concrete or steel plates). Check alignment and secure it with expansion bolts or chemical anchors as prescribed. Once the beam is fully in position and the connections are made, you can gradually remove the temporary props. Watch for any cracking or settlement; the beam may settle slightly as it takes up the load, which is normal if within the calculation’s limits.
6. Wrap the beam in fire-rated board and finish the opening
A bare steel beam must be protected against fire to meet the Dutch fire safety standard (30 or 60 minutes fire resistance, depending on the building type). Encase the beam in fire-resistant gypsum board and fill any gaps with intumescent sealant. After inspection, you can box in the beam with timber or plasterboard to create a clean ceiling line. Plaster, paint, and lay flooring in the newly opened space. This finishing stage is the perfect moment to run any electrical or plumbing rerouting that was planned across the opening.
Typical Costs in the Dutch Market
Saving money by skipping steps is not an option. The table below gives a realistic range for a simple removal of one ground-floor load-bearing wall in a terrace or semi-detached house, opening up to a maximum span of four metres. Prices include VAT and are based on mid-2025 data.
| Item | Price range (€) | Remarks |
|---|---|---|
| Structural engineer (report + site visit) | 450 – 900 | Complex foundations or higher spans increase cost |
| Permit application fees | 250 – 800 | Varies per municipality; larger cities tend to be at the upper end |
| Steel beam, support plates, bolts | 500 – 1,400 | Standard HEA 200 beam about 4m; including delivery |
| Labour (demolition, props, installation) | 1,800 – 3,500 | 2 to 4 days of work for a professional duo-team |
| Fire casing and plasterwork finishing | 600 – 1,200 | Includes materials; significantly more if electrical rerouting is added |
| Total indicative | 3,600 – 7,800 | Excluding unexpected foundation reinforcement |
If your renovation includes removing multiple walls or a wall on an upper floor, scaffolding and additional safety measures will increase the budget noticeably.
Risks and How to Mitigate Them
- Structural collapse: The extreme risk. Mitigated solely by a complete structural calculation, correct temporary props, and disciplined sequencing. Never deviate from the engineer’s instruction.
- Damage to neighbouring property: In terraced and semi-detached houses, vibrations and load redistribution can crack neighbours’ walls. Document the existing condition of party walls with photos before starting. Inform neighbours well in advance and use precision demolition methods near the party wall. Your liability insurance should cover neighbour damage.
- Foundation overload: Removing a load-bearing wall sometimes concentrates so much weight on a small beam support that the existing foundation is no longer sufficient. The constructeur must check this; a foundation investigation may be required. If necessary, micropiles or a local concrete plinth are installed before the beam.
- Asbestos encounter: In houses built before 1994, load-bearing walls may contain asbestos cement products, particularly in older chimney breasts or ventilation shafts. Have a certified asbestos inventory performed if there is any doubt. Mandatory removal by a certified company adds cost and time.
- Delayed permit: Start the permit process as soon as you have the structural design. Build in a buffer of at least three months for any construction schedule.
Practical Tips for a Smooth Renovation
Integrate the load-bearing wall removal into your renovation sequencing from the very beginning. The stage where you remove a structural wall is the dirtiest and most disruptive. Schedule it before any new flooring, kitchen fitting, or wall finishing in the adjacent areas. Once the beam is in place and the fire casing is done, your open-plan canvas is ready. Work with a recognised renovation contractor who specialises in structural adaptations and who can show you similar completed projects. Never attempt this as a DIY project, no matter how handy you are. Dutch building authorities take structural safety extremely seriously, and the risk to your family and neighbours is simply too high.
Plan for dust. Sealing off the work area with plastic sheeting and creating a negative air pressure system (a fan blowing out through a window) dramatically reduces the spread of fine brick dust. Agree on a waste removal plan: a container for mixed construction waste (puincontainer) parked on your driveway or on the street with a temporary obstruction permit from the municipality.
Conclusion
Removing a load-bearing wall is a transformative step that truly opens up a Dutch home for modern, connected living. The success of that transformation, however, rests entirely on respecting the structural logic of the building and the legal framework that protects everyone involved. Start with a thorough structural investigation, secure the correct permit, follow the demolition and installation sequence without shortcuts, and always engage professionals who understand the specific character of Dutch residential construction. When these steps are followed, the result is not just a beautiful open space but one that stands safe and solid for decades to come. Your dream of a seamless kitchen-living expanse is entirely achievable—plan meticulously, proceed slowly, and enjoy the light-filled result.