Rear Extension with an Energy Upgrade for Dutch Family Homes
A rear extension is one of the most transformative building projects for a typical Dutch family home. When you combine that extra living space with a deep energy upgrade, the result is a home that is not only larger and more functional but also warm, quiet, and remarkably cheap to run. This complete guide walks you through every essential step – from navigating the Dutch planning system to choosing the right insulation, heat pump, and renewable energy technologies. Whether you own a classic 1930s terraced house in Utrecht or a 1970s corner property in Eindhoven, these insights will help you create a future‑proof, comfortable home for decades to come.
Why Combine a Rear Extension with an Energy Upgrade?
Many Dutch families first dream of expanding their kitchen or living area towards the garden. However, a standalone extension built to the minimum legal standard (Bouwbesluit) will often leave the original part of the house cold and poorly insulated. By fusing the two projects, you achieve:
- Synergy in construction: One excavation, one contractor, one scaffolding period.
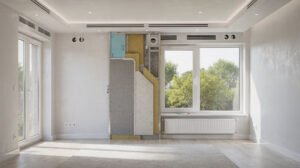
- Continuous insulation envelope: The new extension and the old rear wall can be wrapped in a seamless thermal shell.
- Access to Dutch subsidies: Several financial schemes, such as the ISDE and SEEH, reward combined energy‑saving measures.
- Higher property value: A home energy label A+++ together with additional square meters makes your house stand out on the Dutch housing market.
- Future‑proofing: With the Dutch government aiming for all homes to be gas‑free by 2050, your upgraded home will be ready years ahead of regulations.
Basic Concepts for a Successful Dutch Home Extension
Planning Permission and Building Regulations (Vergunning & Bouwbesluit)
In the Netherlands, many rear extensions fall under vergunningsvrij (permit‑free) construction, but only if you meet strict rules. For a single‑storey extension at the rear of a dwelling, the key conditions are:
- Maximum depth of 4 m from the original rear facade (5 m on a corner plot, provided certain sight‑line requirements are met).
- Maximum height of 5 m, with the wall edge not exceeding 3 m.
- The extension cannot reduce the distance to public green areas below 1 m.
- No more than 50 % of the land that belongs to the main building may be built upon.
Even if your project is vergunningsvrij, you are still obligated to comply with the Bouwbesluit 2012 (Building Decree). This covers structural safety, fire safety, ventilation, and a minimum level of thermal resistance. For new‑build extensions, the current minimum Rc‑value (thermal resistance) for the floor, walls, and roof is 4.5 m²·K/W for the thermal envelope. An energy‑focused renovation will aim significantly higher – typically Rc 6–8 for walls and Rc 6–10 for roofs – to achieve the “BENG” (Nearly Energy Neutral Building) standard or even passiefhuis quality. Always consult an experienced architect or bouwkundig ingenieur to verify that your design meets all local requirements.
Building Physics and Energy Performance (BENG)
Since January 2021, all new buildings in the Netherlands must meet the BENG requirements (Bijna Energie‑Neutrale Gebouwen). For an extension that requires a building permit, the municipality will demand that the new structure satisfies BENG 1 (maximum energy demand), BENG 2 (maximum primary fossil energy use), and BENG 3 (minimum share of renewable energy). In practice, this means you must combine a highly insulated shell with triple glazing, efficient ventilation, and a renewable energy source – precisely the same components you would choose for a voluntary energy upgrade. By aiming for BENG from day one, you automatically produce an extension that is extremely energy‑efficient and ready for a gas‑free future.
Design and Structural Considerations for a Rear Extension
Before ordering insulation or a heat pump, invest time in a design that maximizes daylight, usable space, and structural simplicity.
- Orientation: Large south‑facing glazing captures passive solar heat in winter, but combine it with proper shading (roof overhangs, external screens) to prevent overheating in July.
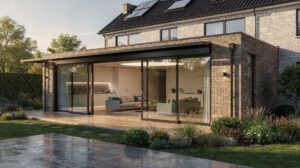
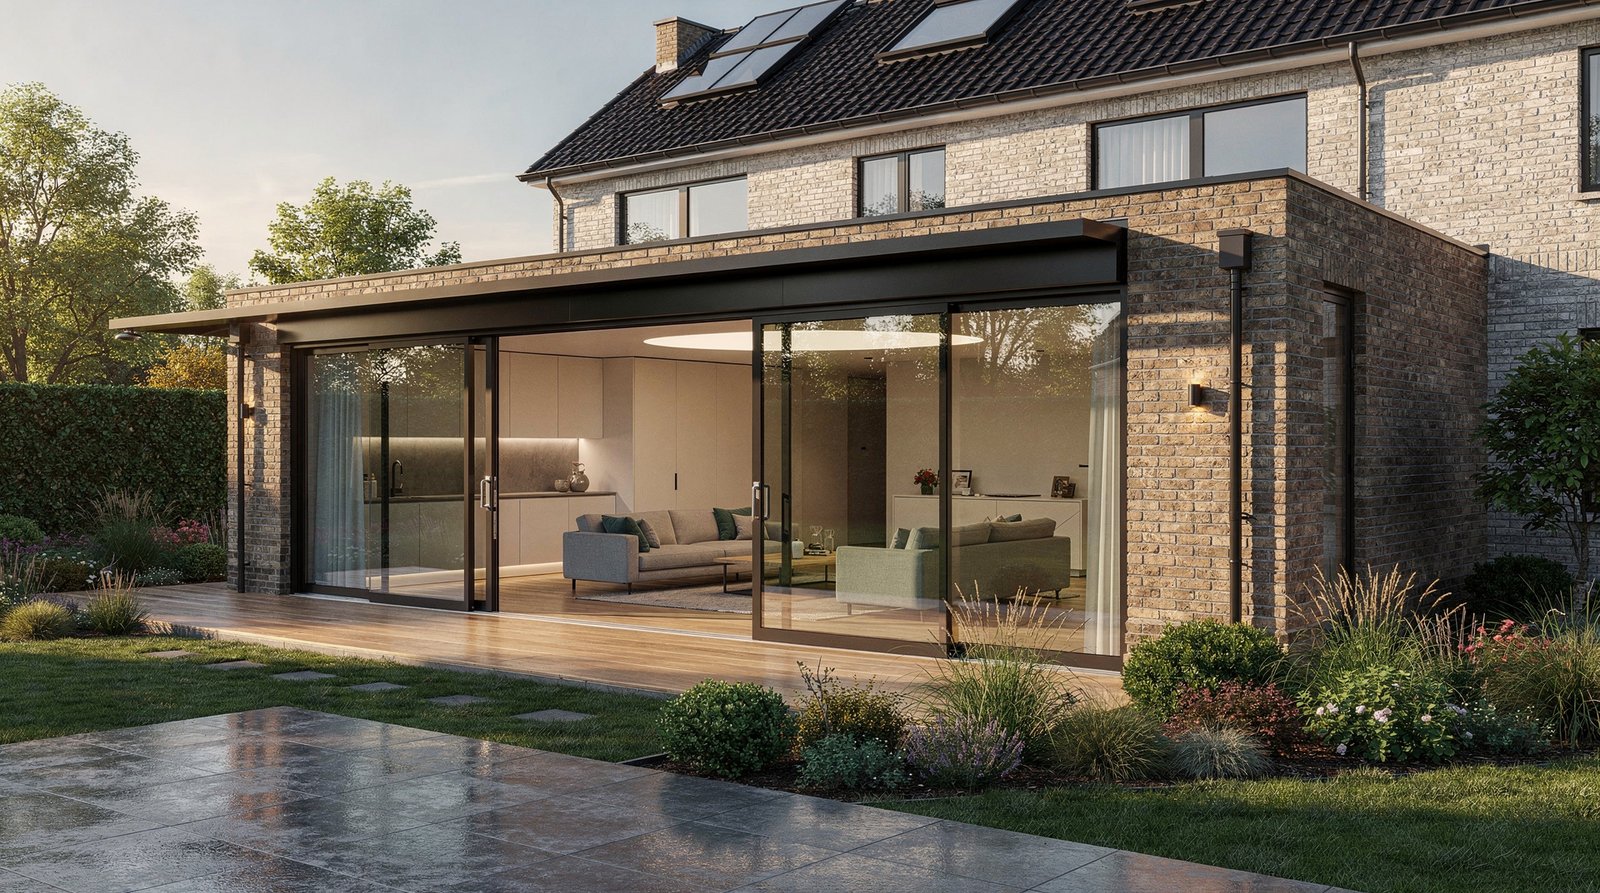
- Connection to the existing house: Removing the original rear wall partly or completely creates a continuous open‑plan floor. A steel portal beam typically carries the load of the first floor or roof above.
- Foundation: In Dutch clay and peat soils, an extension often rests on a concrete slab on foam glass insulation, with foundation beams on piles if the soil is soft. A thorough geotechnical survey (sondering) is essential.
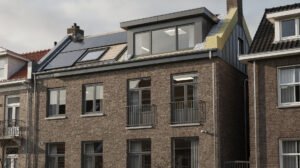
- Roof form: Flat roofs with an EPDM or bitumen covering are common and easiest to insulate. A slight slope (1–2 %) with internal drains prevents water ponding. Pitched roofs with dormers can add architectural interest, but detailing the thermal bridge at the ridge demands careful engineering.
Selecting High‑Performance Materials for the Envelope
The thermal envelope – floor, walls, and roof – decides up to 70 % of the extension’s energy performance. Below is a comparative table of insulation materials that are widely available in the Netherlands, each evaluated for a typical wall cavity or flat roof application.
| Insulation Material | Lambda λ (W/m·K) | Required Thickness for Rc=6.0 | Typical Installed Cost (€/m²) | Environmental Profile |
|---|---|---|---|---|
| Glass wool batts | 0.035 | 210 mm | 25–35 | Low embodied energy, fully recyclable |
| Rock wool boards | 0.036 | 216 mm | 35–45 | Fireproof, high acoustic damping |
| PIR rigid foam (polyisocyanurate) | 0.022 | 132 mm | 40–55 | Excellent space‑saving, low lambda, but petrochemical‑based |
| EPS (expanded polystyrene) | 0.031 | 186 mm | 20–30 | Cheapest rigid foam option, good for below‑grade |
| Wood fibre boards (flexible) | 0.040 | 240 mm | 50–70 | Biobased, regulates moisture, high embodied energy from transport |
For the glazing, select triple‑glass HR+++ units with a typical U‑value of 0.5–0.7 W/m²·K. The frames should be made of FSC‑certified wood, aluminium‑wood composite, or fully recyclable PVC that contains a thermal break. All window junctions must be taped and sealed with airtight membranes to satisfy the required qv;10 air permeability level (typically ≤ 0.15 l/s·m² for true low‑energy buildings).
Heating, Cooling, and Ventilation Solutions
Once the extension is super‑insulated, the heat demand drops dramatically. This opens the door to low‑temperature heating systems that work perfectly with renewable heat sources.
- Underfloor heating (vloerverwarming): Install it in the new concrete slab and, if possible, extend it into the existing living area. Water at 30–35 °C is enough to keep the room comfortable.
- Air‑source heat pump (lucht/water): For a typical 150–200 m² Dutch terraced house, a 5–8 kW monobloc unit can supply space heating and domestic hot water year‑round. Many Dutch suppliers offer silent models (<50 dB at 5 m) that respect the noise limits in a dense residential area.
- Mechanical ventilation with heat recovery (MVHR / balansventilatie): A type‑D ventilation unit recovers up to 95 % of the heat from the exhausted air. Place the unit in a utility cupboard within the thermal envelope and run two duct networks – one for supply, one for return – to all living rooms and bedrooms. The extension must be included in this network to prevent humidity buildup.
- Passive cooling: Because Dutch summers are becoming noticeably warmer, combine external solar shading with a “free‑cooling” bypass in the MVHR unit so that cool night air can flush the building without any compressor work.
Generating Renewable Energy
With the BENG 3 requirement mandating at least 50 % renewable energy share for new constructions, a rooftop photovoltaic (PV) system is a logical addition. A flat‑roof extension is ideal for mounting a solar array at a 10–15° tilt facing south. For a 30 m² extension roof, you can fit approximately 3 kWp of panels, generating roughly 2,800 kWh per year – enough to cover the annual electricity consumption of a heat pump and MVHR system. If the original house roof is also available, consider combining the PV‑panels with a solar water heater to pre‑heat the hot water cylinder in summer, thereby extending the heat pump’s lifespan.
Financing and Dutch Subsidy Schemes
The Dutch government actively encourages home energy upgrades. As of 2025, the following financial tools are available for homeowners combining a rear extension with energy efficiency measures:
| Subsidy / Financing | What it covers | Conditions | Typical amount |
|---|---|---|---|
| ISDE (Investeringssubsidie Duurzame Energie) | Heat pumps, solar water heaters, connections to a heat network | Installation by a certified installer; minimum efficiency values (e.g., A-label heat pump) | €300–€1,600 per item, depending on capacity and CO₂ performance |
| SEEH (Subsidie Energiebesparing Eigen Huis) | Combined insulation measures (cavity wall, roof, floor, triple glass) and a renewable source | At least 2 different energy‑saving measures, or 1 measure plus a renewable system. Must be carried out within 24 months. | Approx. 20 % of the eligible costs, up to a maximum of €4,000 per homeowner, with higher ceilings if multiple measures are taken |
| BTW‑terugave on labor | 9 % VAT on labor costs for renovation and insulation work | Directly offset by your contractor; available for homes older than 2 years. | Saves you the difference between 21 % and 9 % VAT |
| Nationaal Warmtefonds (Energy saving loan) | Low‑interest loans for heat pumps, insulation, solar panels | Available regardless of income; interest rate approx. 1.6–2.2 % (2025) with no repayment penalty | Up to €65,000 per household |
To secure the SEEH subsidy, plan your project carefully. You must apply through the RVO website before signing a contract with the installer. Keep all invoices, product datasheets, and the installatieverslag; the subsidy will be paid after the works are finished and inspected.
Working with Contractors and Planning the Timeline
A complex renovation like a rear extension with full energy retrofitting demands a clear tender process and a realistic schedule.
- Phase 1 – Investigation (1–2 months): Commission a structural engineer for a sondeerrapport, order an as‑built survey, and check for asbestos in the rear parts you will demolish.
- Phase 2 – Design and permit (2–4 months): Work with an architect to combine the spatial plan with the energy concept. Submit an omgevingsvergunning if required, even for a vergunningsvrij project you may need a simple notification (melding) for structural safety.
- Phase 3 – Tender and contractor selection: Request at least three quotes from qualified gecertificeerde installateurs for the heat pump, ventilation, and solar systems. Choose a general building contractor (aannemer) who has proven experience with low‑energy extensions.
- Phase 4 – Construction (3–5 months): Demolish the old rear extension, pour the new foundation, erect the structural frame, install insulation, windows, roof membrane, then fit underfloor heating, MVHR ducts, and the heat pump. The final interior finish – plastering, screed, tiling – usually takes an additional month.
- Phase 5 – Commissioning and handover: Perform a blower‑door test to check airtightness, balance the ventilation system, and commission the heat pump. Submit the completed project to the RVO for your subsidy claim.
Practical Tips for a Smooth Renovation
- Start with an energy audit: An energieadviseur can model the whole house and identify where your budget yields the most CO₂ reduction per euro. This prevents over‑insulating one area while leaving thermal bridges elsewhere.
- Plan for a future gas‑free kitchen: Even if you are not ready to abandon gas cooking, install a separate circuit with a reinforced electrical cable so you can switch to induction later without ripping up the floor.
- Coordinate the airtight layer: The airtight membrane on the inside of the extension must connect seamlessly with the existing house. Use liquid‑applied membranes at tricky junctions and insist on a blower‑door test before plastering.
- Incorporate smart home controls: A zone‑based temperature control linked to the weather forecast can cut the heat pump’s energy use by a further 10–15 %.
- Check for local energy cooperatives: Some Dutch municipalities offer extra subsidies or collective discounts on solar panels and heat pumps through a energiecoöperatie.
- Do not overlook acoustic comfort: When you remove rear walls, airborne noise from the garden can increase. Choose triple‑glass with asymmetric panes and fill any lightweight wall cavities with rock wool to maintain the quietness of a traditional Dutch home.
Cost Overview and Expected Return
The table below gives indicative all‑in costs (including VAT and labor) for a 25 m² rear extension in a standard Dutch terraced house, executed to a high energy standard.
| Item | Cost range (€, incl. BTW) |
|---|---|
| Architect and structural engineer fees | 3,000–6,000 |
| Foundation (concrete slab on foam glass, 4 steel piles) | 8,000–12,000 |
| Walls, roof, triple‑glazed sliding doors (6 m wide) | 30,000–45,000 |
| Underfloor heating + heat pump (6 kW) + buffer vessel | 12,000–18,000 |
| MVHR unit + ductwork | 5,000–8,000 |
| 3 kWp PV system (roof mounted) | 4,000–6,000 |
| Interior finishing (plastering, screed, tiling) | 6,000–10,000 |
| Total | 68,000–105,000 |
| Less ISDE + SEEH subsidy | −3,500–5,500 |
| Less 9 % VAT advantage on labor | −2,500–4,000 |
| Net investment | ≈ 60,000–95,000 |
The annual energy savings from converting a label D home to an A+++ label and adding a heat pump typically reach €2,000–€3,000, giving a simple payback of 20–30 years. However, the increase in market value and the improvement in everyday comfort – constant temperature, draft‑free rooms, fresh air – far outweigh the pure financial calculation. Moreover, a low‑energy extension largely insulates you from future gas price volatility.
Conclusion
A rear extension with a comprehensive energy upgrade is a once‑in‑a‑generation investment for Dutch families. By integrating structural, thermal, and systems design from the very start, you create a home that expands effortlessly into the garden while becoming a benchmark for comfort and sustainability. Adhere to the Dutch building regulations, aim higher than the minimum Rc values, and make full use of the ISDE, SEEH, and BTW‑terugave schemes that are specifically designed to accelerate energy‑efficient renovations. The result is a future‑proof dwelling that keeps energy bills low, resale value high, and living quality exceptional throughout the Dutch seasons. Begin with a thorough assessment of your existing soil and structure, engage a team that respects airtight detailing, and watch your family house transform into a light‑filled, ultra‑efficient home that will serve you for decades.