New Ground Floor, New Heating, New Insulation in One Renovation Phase
For Dutch homeowners, the ground floor represents the very foundation of daily comfort. It is the space where cold radiates up through worn carpet, where uneven tiles tell a story of decades of settling, and where energy bills silently climb month after month. Undertaking a ground floor renovation is a significant decision, but the real strategic genius lies not in tackling these problems individually over a span of years, but in synchronizing them into a single, powerful renovation phase. By combining a new ground floor, underfloor heating, and high-performance insulation in one go, you create a harmony of efficiency that a fragmented approach simply cannot match. This deep retrofit strategy is not just about immediate gratification; it is the most logical, cost-effective, and technically superior path to a future-proof Dutch home.
Why Renovating in Stages Costs More
Imagine deciding to install underfloor heating this year, planning to redo the floor finish next year, and contemplating underfloor insulation perhaps five years later. On the surface, this phased approach seems easier on the wallet, but in the Dutch construction reality, it is a recipe for double spending and missed technical opportunities. Renovation sequencing matters because the layers of a ground floor are physically interdependent. Your insulation performance dictates the required heating output; your screed thickness is determined by the heating system; your final floor covering must be compatible with the thermal resistance below it. When these elements are planned in isolation, you pay for mobilization costs, waste removal, and labor multiple times. A single, integrated phase is the hallmark of a true deep retrofit, where the sum of the parts yields a whole-house transformation far greater than piecemeal upgrades.
Starting from the Earth Up: The Art of Ground Floor Removal
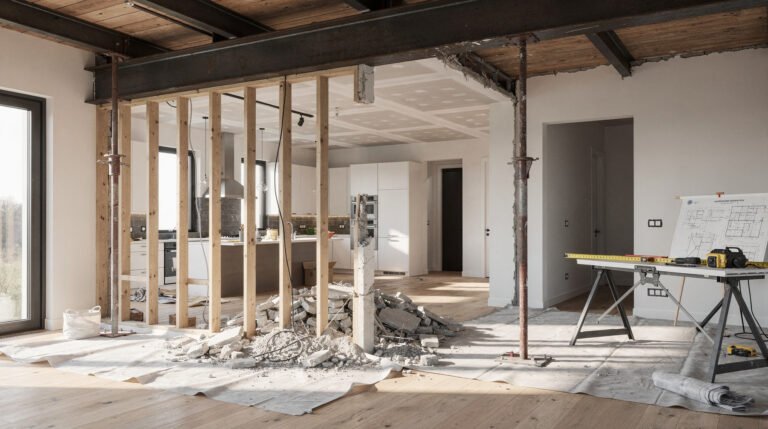
Before the new comfort is built, the old must be completely removed. In a typical Dutch terraced house or semi-detached home dating from the 1930s to the 1970s, this means breaking out the existing concrete slab or wooden beams. You must fully disconnect utilities and cap gas lines before the jackhammers begin. The goal is to excavate down to the bare sand substrate. This is a noisy, dusty, and invasive phase, requiring professional contractors with experience in draagconstructies (load-bearing structures). You must always check for asbestos in old vinyl layers or tile adhesives before disturbing the material; a mandatory asbestos inventory report is legally required for houses built before 1994. Budget at least €45 to €70 per square meter for professional stripping and debris removal, including the mandatory scheepscontainer (waste container) permit from your municipality. Skipping a full dig-out to save money now will condemn your new insulation and heating system to an unstable, potentially damp foundation.
High-Performance Floor Insulation: Your Unseen Energy Vault
With the raw sand base exposed, you can install the most influential layer in your thermal envelope. Most uninsulated Dutch ground floors lose 15-20% of total household energy, which is why the Dutch Bouwbesluit requires a minimum Rc-value of 3.7 m²K/W for new-build situations. For a deep retrofit, aim for an Rc of 5.0 or even 6.0. The two main solutions are EPS (expanded polystyrene) foam boards and PIR (polyisocyanurate) rigid boards, and your choice depends on space constraints and moisture strategy. EPS is more vapor-open and cost-effective for thick layers, while PIR offers higher thermal resistance per centimeter, which matters in Amsterdam apartments with low ceiling heights. Standard 100mm PIR insulation achieves an Rd-value above 4.5. Tape all board joints with aluminum tape to create a continuous vapor barrier; this prevents opstijgend vocht (rising damp) from condensing within the insulation layer.
Material Comparison for Dutch Ground Floor Insulation
Material: PIR Boards (Alu-capped)
Rc per 100mm: 4.5 – 5.5
Cost (per m²): €18 – €28
Best Application: Limited height, highest thermal performance
Material: EPS 100/Iso-Smet
Rc per 100mm: 3.8
Cost (per m²): €12 – €18
Best Application: Thick floor sections, balanced moisture regulation
Material: Foam Glass Gravel
Rc per 100mm: ~1.8
Cost (per m²): €30 – €45
Best Application: Renovation of old, difficult, damp substrates
Underfloor Heating (Vloerverwarming): The Heart of the System
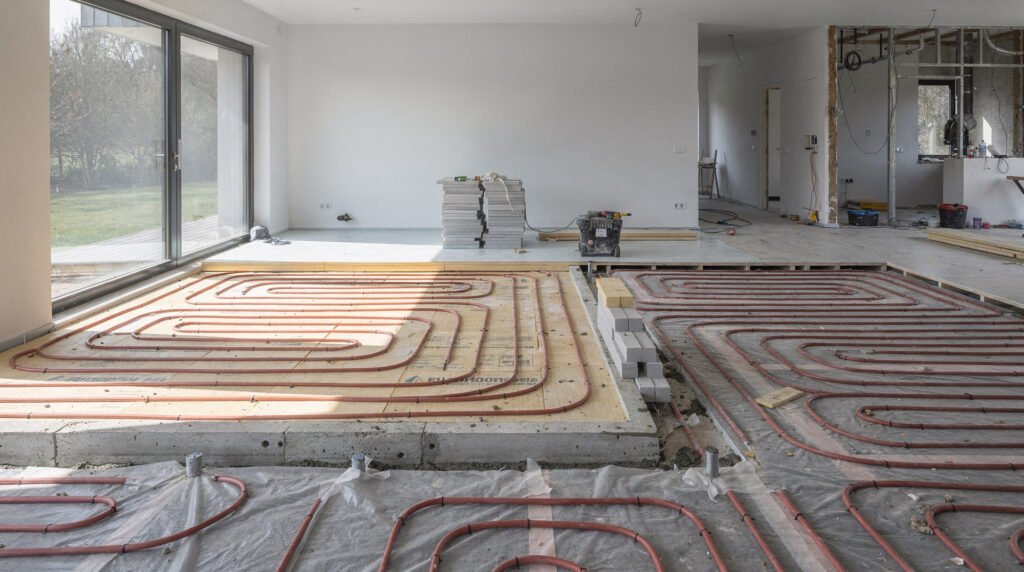
You now lay your heating system directly onto or within the structural screed above the insulation. Skip over-dimensioned radiators that eat up wall space; modern water-based underfloor heating pairs well with the low-temperature regime of efficient heat pumps. Choosing between a dry-build system and a traditional natte zandcement (wet sand-cement) screed matters. Wet screed acts as a strong thermal mass, with typical thicknesses of 70mm that envelop the pipes completely. It stores heat and releases it slowly, ideal for continuous heating patterns. Dry systems, using pre-routed gypsum boards or studded mats, install faster and weigh less, making them suitable where the floor structure cannot bear heavy loads, though they offer less thermal mass. Have your installer calculate pipe spacing precisely; 100mm spacing delivers higher heat output than 150mm, which matters in rooms with large glass facades.
The Screed: Rules of Thickness and Drying in a Maritime Climate
The cement screed is not just filler; it is a defining engineering layer. Aim for a minimum of 45mm coverage above the heating pipes to prevent cracking and ensure even heat distribution. In the Netherlands, high relative humidity slows screed drying considerably. Do not trust quick-dry promises without verification. The rule of thumb is one week of drying per centimeter for the first 4cm, then two weeks per additional centimeter. A standard 6cm screed therefore needs five to six weeks of drying with natural ventilation only, no forced heating, before commissioning the boiler. A professional vloerverwarming inregelrapport (balancing report) is mandatory. After drying, follow the stookprotocol: raise the water temperature gradually from 20°C in increments of 5°C per day until the maximum design temperature is reached, then cool it down just as slowly. Rushing this causes krimpscheuren (shrinkage cracks) in the finished floor.
Sequencing and Practical Tips for a Flawless Execution
A successful deep retrofit depends on careful logistical sequencing, and you are the one steering the project. Follow this practical roadmap to avoid condensatieproblemen and thermal bridging.
- Pre-Phase Asbestos Check: Engage a certified SGS or Search bureau for a Type A asbestos inventory before a single tile is lifted. No report, no legal start.
- Complete Strip and Level: Excavate to the required depth, ensuring a clean, level sand base. Lay blinding sand and compact it perfectly.
- Perimeter Edge Insulation: Before the main insulation boards, run a strip of 10mm foam expansion joint, the kantstrook, around all vertical walls. This isolates the floating floor and prevents impact sound transmission to the walls. Do not skip this; it is the first line of defense against thermal bridges.
- Vapor-Tight Layer: Lay a heavy-duty polyethylene (PE) membrane, minimum 0.2mm thick, on the sand. Carefully overlap seams by 500mm and tape them, then turn this membrane up over the edge insulation.
- Insulation “Pressure Fit”: Place your insulation boards in a tight, staggered pattern. Ensure they are in full contact with the edge strip. The PE membrane should sit between the sand and the insulation, never above the insulation, to prevent screed water from draining away and blocking the vapor barrier function.
- Pipe Installation: Fix the heating pipes using the manufacturer’s tacker system or grids. Photograph the entire circuit layout with a tape measure clearly visible for future reference before the screed covers it.
- Screed Pour and Curing: Pour the screed; do not let the sun beam through windows directly onto it. Cover it with plastic sheeting for the initial 7-day curing phase, not to make it dry, but to slow down the hydration and increase strength. Then, uncover and ventilate naturally.
- Final Flooring Integration: Choose a final floor with a low thermal resistance, ideally below 0.09 m²K/W. Ceramic tiles or polished concrete are the supreme conductors for underfloor heating.
Phase Execution: Single-Phase vs. Fragmented Renovation
Project Component: Total Disruption Period
Fragmented (3 Phases over 5 Years): 15+ weeks (separated)
Single Deep Retrofit Phase: 7-10 weeks continuous
Project Component: Waste Container & Permits
Fragmented (3 Phases over 5 Years): 3 separate applications and fees
Single Deep Retrofit Phase: 1 single application
Project Component: Floor Height Mismatch Risk
Fragmented (3 Phases over 5 Years): Very high; rest of house unchanged
Single Deep Retrofit Phase: Managed and leveled in one operation
Project Component: Thermal Envelope Integrity
Fragmented (3 Phases over 5 Years): Compromised joints and cold bridges
Single Deep Retrofit Phase: Complete, continuous, fully sealed envelope
Project Component: Heating Balance
Fragmented (3 Phases over 5 Years): Difficult to calibrate with mixed emitters
Single Deep Retrofit Phase: Perfect low-temperature circuit balance
Matching Your New Floor to the Boiler Room: The Heat Pump Imperative
Your technically flawless new floor will expose the weakest link in your energy chain: your heat source. A poured screed with underfloor heating and Rc=5.0 insulation has such a low heat demand that an old HR-ketel will short-cycle or constantly modulate, operating inefficiently. You must seriously consider this the moment to install a fully electric or hybrid heat pump. The low supply temperature of 35°C to 40°C required by your new vloerverwarming is the exact sweet spot where air-to-water heat pumps achieve a Coefficient of Performance (CoP) of 4.5 or higher. This means for every 1 kWh of electricity, you get 4.5 kWh of heat. Connect your heat pump’s weather-compensated control, the weersafhankelijke regeling, directly to your underfloor heating distributor; this creates a self-regulating system that eliminates all traditional room thermostats and achieves the ultimate in comfort efficiency.
A Foundation for Decades
A home in the Netherlands is a vessel for living well, and it starts from the ground up. By weaving together a new ground floor, the invisible blanket of high-grade insulation, and the gentle, silent warmth of underfloor heating into one coordinated phase, you are not just renovating; you are fundamentally re-engineering your home’s interaction with energy and climate. You eliminate years of continuous dust, evasion of temporary kitchen units, and the staggering cumulative expense of doing work three times over. This is the essence of a deep retrofit: a singular act of building that resets your home’s thermal performance to a state better than new. Stand firm in your planning, enforce the protocol of drying times and vapor sealing, and secure the services of a contractor who understands the unity of these tasks. The result is a sublimely silent, dust-free, and astonishingly efficient living space that will effortlessly carry you into the fossil-fuel-free future the Netherlands has committed to. The ground beneath your feet is your greatest asset; transform it wisely, and transform it once.