How to Prevent Condensation and Mould After Insulation Upgrades
Introduction
Improving your home’s insulation is one of the most effective ways to reduce energy bills and increase comfort, especially in the Dutch climate with its damp winters and mild summers. Yet after sealing walls, roofs, and floors, many homeowners find new condensation, damp spots, or black mould on surfaces. This does not mean insulation was a mistake. It is a warning that the balance between heat, moisture, and airflow inside the home has changed. Controlling that balance is essential for a healthy renovation. Whether you are upgrading your spouwmuur, placing dakisolatie under the roof tiles, or insulating the ground floor, the principles of condensation prevention and mould control are the same. This guide explains what happens inside your walls after an insulation upgrade, why mould appears, and the practical steps that keep your home dry, fresh, and structurally sound for decades.
Basic Concepts: Why Insulation Changes Everything
Before looking at specific strategies, a few core concepts are useful. Dutch homes, especially those built before 1992, often “breathed” unintentionally through gaps, cracks, and poorly sealed joints. This uncontrolled airflow carried away excess moisture but also wasted large amounts of heat. Once you install high-performance insulation and make the envelope more airtight, that moisture stays indoors. Without a planned exit route, water vapour condenses on the first cold surface it finds, often the inner side of a newly insulated wall or a hidden timber beam. Here is the vocabulary that will help you diagnose and solve the problem:
- Relative Humidity (RH): The amount of water vapour present in the air expressed as a percentage of the maximum the air can hold at that temperature. A healthy indoor RH for Dutch homes lies between 40% and 60%. Above 70%, mould spores can germinate within 24 to 48 hours.
- Dew Point: The temperature at which air becomes saturated and water vapour turns into liquid condensation. If any surface inside your home (a window, a cold corner, the back of a plasterboard wall) falls below the dew point, condensation will form there, even if the room feels warm.
- Interstitial Condensation: Condensation that occurs inside the building structure, within the insulation layer or behind the vapour barrier. This hidden moisture can rot timber, corrode metal fixings, and feed mould out of sight for years before becoming visible.
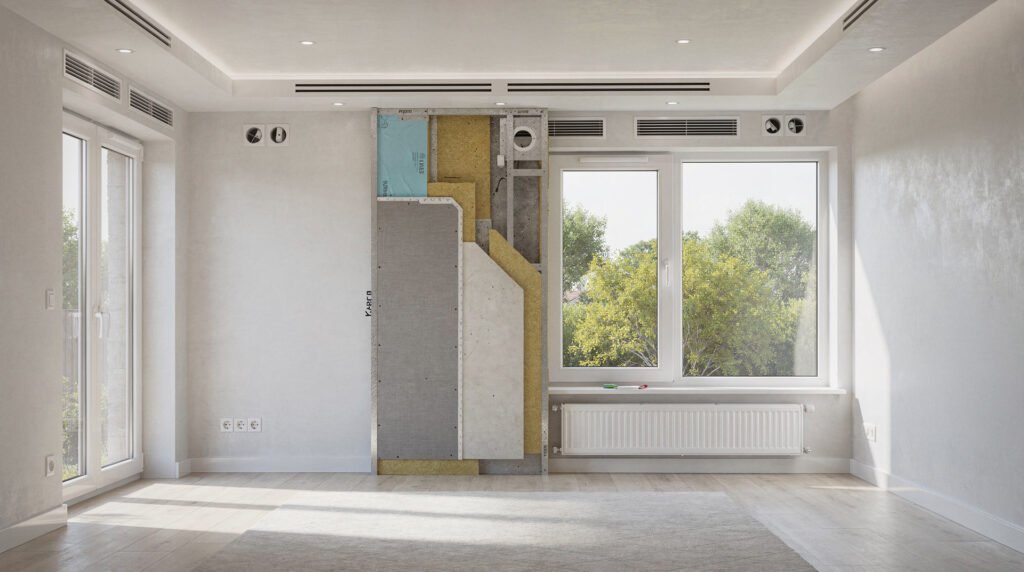
- Vapour Permeability and Vapour Resistance: Materials are classified as vapour-permeable (they allow moisture to pass through, like wood fibre or cellulose) or vapour-resistant (they block moisture, like closed-cell foam or polyethylene foil). A well-designed Dutch wall assembly works from vapour-open on the cold outside to vapour-tight on the warm inside, allowing moisture that does enter to dry outwards.
- Airtightness vs. Breathability: Airtightness stops uncontrolled air leakage; it is essential for energy efficiency. Breathability refers to the ability of a material to let moisture vapour diffuse through. In a modern, healthy home, you aim for a highly airtight but vapour-permeable construction where possible, combined with adequate mechanical ventilation.
Why Condensation Appears After Insulation Upgrades
The most common scenario in Dutch terrace houses, vrijstaande woningen, and apartments follows a predictable pattern. The owner invests in spouwmuurisolatie, roof insulation, or high-efficiency glazing. Heating costs drop and rooms feel less draughty. Within weeks, black spots appear in bedroom corners, on the ceiling near the outer wall, or behind furniture against an outside wall. The reason is a shift in the thermal and moisture profile of the building. Before the upgrade, the inner leaf of the cavity wall was relatively warm because heat leaked through from inside. That warm surface pushed the dew point into the cavity or beyond, keeping internal plaster dry. After filling the cavity with insulation, the inner leaf becomes much colder because the insulation holds the heat inside the room. Moist indoor air that migrates into the wall cools rapidly and reaches its dew point within the plaster or brick, exactly where you do not want it. A similar mechanism affects uninsulated roof slopes: once insulation is added from the inside or outside, the roof deck stays cold, and any warm, humid air that bypasses the vapour barrier will condense on the cold sheathing. This is why stuffing insulation into every gap without upgrading ventilation and carefully detailing vapour control layers leads to hidden mould and structural decay.
The Critical Role of Ventilation in a Well-Insulated Dutch Home
In the Netherlands, the Bouwbesluit (Building Decree) mandates minimum ventilation rates for new constructions and major renovations. Many existing homes fall far short of these standards, relying on natural ventilation through poorly sealed windows and cracks. When an insulation upgrade seals those accidental air paths, you must introduce a deliberate, controlled ventilation strategy. Otherwise, moisture from cooking, showering, drying laundry, and even breathing accumulates rapidly. A family of four can easily produce 10 to 15 litres of water vapour per day, and that moisture must be removed before it condenses.
Natural Ventilation: A Starting Point, Not a Complete Solution
Natural ventilation depends on wind pressure and temperature differences to drive air through open windows, roosters (grilles), and the roof. It is passive and cost-free, but in an airtight, well-insulated home it is unreliable. On still, humid winter days, barely any air moves. Dutch regulations often require self-regulating ventilation grilles in window frames or walls (ventilatieroosters) in rooms where humid air is produced, and these are a minimum. For dependable condensation prevention, combine natural inlets with a demand-driven mechanical extraction system in the kitchen, bathroom, and toilet.
Mechanical Ventilation: The Modern Standard for Mould Control
A mechanical ventilation system (MVHR, or balanced ventilation with heat recovery, known in Dutch as “balansventilatie met warmteterugwinning”) constantly extracts moist air from wet rooms and supplies fresh, filtered, pre-warmed air to living rooms and bedrooms. Because the system recovers up to 90% of the heat from the outgoing air, it drastically reduces energy loss while maintaining a dry indoor climate. For renovations in older Dutch homes where space for ductwork is limited, a decentralized mechanical ventilation unit (decentraal ventilatiesysteem) with individual fans in the façade can offer a highly effective alternative. Install at least a CO₂- or humidity-controlled mechanical extraction fan in the bathroom that automatically boosts when showering. These systems lower indoor relative humidity, prevent the build-up of condensation on cold surfaces, and make mould control far simpler.
Choosing the Right Insulation Materials and Techniques for the Dutch Climate
Insulation materials differ in how they handle moisture. The choice of material and the way it is installed can either promote or prevent condensation. The table below summarizes the most common insulation types used in Dutch renovations and their vapour behaviour.
Insulation Material: Glass wool / Rock wool
Vapour Permeability: Very vapour-permeable
Typical Dutch Applications: Cavity wall, timber frame, loft floors
Critical Installation Note: Must be paired with a vapour barrier on the warm side in cold-roof or wall applications.
Insulation Material: EPS / XPS (rigid foam boards)
Vapour Permeability: Vapour-resistant to vapour-tight
Typical Dutch Applications: External (buitengevelisolatie), ground floor
Critical Installation Note: Do NOT install on the warm side of a vapour-permeable construction without expert hygrothermal analysis.
Insulation Material: Wood fibre / Cellulose (inblaasisolatie)
Vapour Permeability: Highly vapour-permeable (moisture-buffering)
Typical Dutch Applications: Roof slopes from outside, timber stud walls
Critical Installation Note: Exceptionally forgiving in old buildings; allows diffusion drying. No foil vapour barrier needed if installed correctly.
Insulation Material: PUR / PIR foam
Vapour Permeability: Vapour-tight
Typical Dutch Applications: Flat roof, floor insulation, inner wall lining
Critical Installation Note: Acts as its own vapour barrier. All joints must be taped and sealed perfectly to avoid moisture entrapment.
Insulation Material: Spray-applied closed-cell PUR
Vapour Permeability: Vapour-tight
Typical Dutch Applications: Cavity wall injection (not always advisable)
Critical Installation Note: Can block drying capacity of the wall. Only suitable in certain cavity conditions; always consult a specialist.
Imperative rule for Dutch cavity walls: When insulating an existing spouw, always verify that the cavity is clean, free of mortar snots, and that the outer leaf can dry to the outside. If you use a material that completely blocks vapour movement, like injected foam, moisture trapped in the inner leaf will have nowhere to go. For older brick homes, vapour-permeable glass wool flakes (glaswolvlokken) or mineral wool combined with a ventilated cavity are often the safest choice. For roof renovations, consider a vapour-open underlay beneath the tiles and a smart vapour retarder (klimaatfolie) on the inside that adjusts its vapour resistance according to humidity. This one detail can prevent countless condensation prevention failures.
Detailed Prevention Strategies for Key Areas in Your Home
Each zone of a Dutch house has its own moisture risks. Approach them systematically.
Attic and Sloped Roof
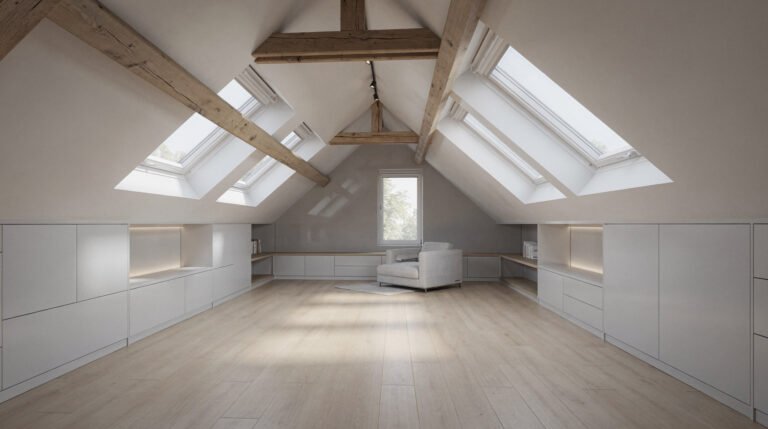
Roof insulation is often the single biggest energy saver, but also the most condensation-prone area. After insulating, the space between insulation and roof tiles becomes very cold. Ensure a continuous ventilated air gap of at least 2 cm between the insulation and the roof underlay (tengels and panlatten already provide some). Install a high-quality, airtight vapour barrier on the warm side of the insulation, tape all seams with acrylic or butyl tape, and seal penetrations for cables or spotlights with airtight grommets. If you ever notice small dark marks on the ceiling plasterboard, do not ignore them; use a moisture meter to check the insulation immediately.
Cavity Walls (Spouwmuren)
Before any wall insulation, inspect the condition of the outer brickwork. Repoint damaged mortar, and check that weep holes (open stootvoegen) at the base of the wall are clear to allow any rain penetration to drain out. Choose an insulation material that does not create a capillary bridge. After installation, monitor the internal wall surface with a hygrometer for a full winter. If you detect rising relative humidity or damp patches at the base, improve below-floor ventilation or add a DPC (damp proof course) treatment before the problem escalates.
Ground Floor and Crawl Space (Kruipruimte)
A poorly ventilated crawl space is a large moisture reservoir. Applying floor insulation from below (bodemisolatie or vloerisolatie via de kruipruimte) reduces heat loss but can trap ground moisture evaporating upward. Always combine underfloor insulation with adequate crawl space ventilation, with openings in the perimeter walls on opposite sides, and consider placing a vapour-resistant foil on the warm side or using a fully closed insulating system like PIF (polyisocyanurate with aluminium facing). In many Dutch regions, completely sealing the crawl space with a reinforced plastic membrane on the soil and adding small mechanical ventilation is the most effective form of healthy renovation.
Practical Tips: A Day-to-Day Action Plan for Condensation and Mould Control
Technology and materials only do their job if the occupants adjust their habits. The following numbered list provides a clear routine. Begin implementing these steps immediately after your insulation upgrade.
- Ventilate with purpose. Open windows wide for 10 to 15 minutes in the morning and evening, even in winter. This exchanges the entire volume of humid air without cooling down the walls. Do not leave windows on a tilt setting all day; it wastes heat without sufficient air change.
- Activate mechanical exhaust every time you shower or cook. Leave the bathroom fan running for at least 20 minutes after showering. Use the cooker hood that extracts to the outside, not a recirculating model.
- Monitor indoor relative humidity. Place low-cost digital hygrometers in the bedroom, living room, and near any previously damp wall. Aim to keep readings between 45% and 55%. If levels consistently exceed 65%, increase ventilation or use a dehumidifier.
- Do not dry laundry indoors without substantial airflow. A full load of washing releases up to 4 litres of water. If outdoor drying is impossible, use a condensation dryer or place the airer in a well-ventilated room with the window open and the door closed.
- Keep a steady background temperature. Avoid letting rooms cool below 15°C overnight. A cold room holds less moisture in the air, so the same absolute amount of water vapour will push relative humidity higher, and surfaces will more easily hit the dew point.
- Pull furniture slightly away from external walls. A 5 to 10 cm gap behind a wardrobe or sofa allows air to circulate behind it, preventing cold spots where mould thrives.
- Inspect and clean ventilation grilles quarterly. Dust and fluff quickly clog inlets and outlets, reducing airflow by half or more. A simple vacuum and wipe restores function immediately.
- Address leaks and rising damp immediately. Leaking gutters, cracked downpipes, or failing pointing can saturate walls, overwhelming any drying capacity. First, fix all external water ingress; only then will internal measures succeed.
- Wipe visible condensation daily. In the first winter after insulation, you may still see condensation on metal window frames or single-glazed windows. Use a cloth to dry these surfaces every morning to stop mould spores from taking hold.
- Test your crawl space humidity. Place a small, battery-powered hygrometer in the kruipruimte for one month. If relative humidity stays above 80%, additional ventilation or sealing of the soil is needed before the problem migrates through the floor.
What to Do if Mould Already Appears
Act immediately and thoroughly. First, protect yourself with gloves, safety goggles, and an FFP2 mask. Small areas of mould (less than half a square metre) can be cleaned with a mixture of water and a few drops of detergent; wipe with a clean, damp cloth and dry the surface completely. Avoid bleach, as it does not kill mould roots on porous materials and can create toxic fumes. For larger areas or recurring mould, cut back the plaster or remove the affected insulation to find and treat the source of moisture. Only after the surface is dry and structurally sound should you repair and repaint with a vapour-permeable, mould-resistant primer.
Conclusion
Insulation upgrades are a worthwhile investment for Dutch homes, but they only work alongside proper ventilation and moisture management. The order matters: design your insulation system with vapour-open or vapour-tight principles suited to each assembly, then install active ventilation, and finally maintain daily habits that keep humidity in check. No single product prevents condensation. Lasting mould control comes from a well-detailed building envelope, a mechanical airflow plan, and consistent occupant behaviour. Follow the steps outlined here: choose the right insulation method for your spouw, maintain a ventilated roof gap, and keep up the morning airing. Done together, these measures keep your home warm, dry, and mould-free through every Dutch winter.