Heat Pump Ready Renovation Checklist for Pre‑2019 Dutch Homes
The Netherlands is accelerating its transition away from natural gas. With the phasing out of net metering, rising energy prices, and the ambition to make 1.5 million homes aardgasvrij by 2030, installing a heat pump is no longer a futuristic idea – it is a strategic investment. Yet, simply swapping a gas boiler for a heat pump in a home built before 2019 often leads to disappointment, high electricity bills, or an uncomfortable indoor climate. The key to success is making your home heat pump ready first. This means creating a building envelope that demands so little energy and a heat distribution system that works at low temperatures that a heat pump can operate efficiently all year round.
This guide, tailored to Dutch homes built before 2019, provides a renovation checklist, practical knowledge, and research-backed recommendations. Whether you live in a ruitjeshuis, a vrijstaande woning, or an appartement, the steps below will help turn your property into a high-performance, low-temperature home that is heat pump ready.
Basic Concepts: What Does “Heat Pump Ready” Actually Mean?
A home is heat pump ready when its design and installations allow a heat pump to supply all space heating and domestic hot water needs while maintaining a high coefficient of performance (COP). COP indicates how many units of heat the pump delivers for every unit of electricity consumed. In a poorly insulated house that still needs a supply temperature of 70 °C or more, a heat pump’s COP can plummet below 2.0, making it more expensive to run than a gas boiler. By contrast, a well‑prepared home operates at supply temperatures of 45 °C or even lower, enabling modern heat pumps to achieve a seasonal COP of 4.0 or higher.
For a Dutch home, heat pump ready rests on three pillars:
- Minimal heat loss – the building’s insulation, airtightness, and glazing reduce transmission and ventilation losses to a level where peak heating demand per floor area is low.
- Low‑temperature heat distribution – the radiators, underfloor heating, or convectors are sized to maintain a comfortable indoor temperature (typically 20–21 °C) with a supply temperature of 45 °C, and ideally 35 °C on design days.
- Efficient ventilation with heat recovery – controlled ventilation prevents unnecessary heat loss while securing good air quality.
The remainder of this article explains exactly how to achieve this state in a pre‑2019 Dutch home.
1. Understanding the Pre‑2019 Dutch Home
Most dwellings built before 2019 were designed around high‑temperature heating systems (radiators fed with water at 70–90 °C) and have an energy label between C and E. Typical characteristics include:
- Cavity walls with limited or no insulation (spouwmuur without insulation, or only partial filling).
- Roof insulation that falls far below the current new‑build standard of Rc ≥ 6.0 m²·K/W.
- Double glazing that is often standard thermopane (U‑value around 2.8 W/m²·K) or early HR‑glas.
- Natural ventilation via roosters and crawl space vents, leading to uncontrolled drafts and heat loss.
- Gas‑fired combi boilers (combiketel) that provide instantaneous hot water without a storage tank.
- Single‑phase electrical connections of 35 A, often insufficient for a larger monobloc heat pump.
According to RVO data, the average natural gas consumption of a pre‑2019 Dutch home ranges from 1,200 m³ (appartement) to over 2,000 m³ (vrijstaande woning) per year. To bring heat demand down to levels where a heat pump becomes economical, annual space heating demand should be reduced to below 80 kWh/m², and ideally to the 50 kWh/m² required for the “Standaard” for heat pump readiness used by many installers.
2. The Insulation Foundation: Upgrading the Building Envelope
Insulation is the single most important step in any Dutch renovation aimed at heat pump readiness. The higher the insulation value, the lower the required supply temperature, and the better the heat pump performs. The following table summarizes the minimum target Rc‑values for building components after renovation. Use these as your guiding benchmarks.
Building Component: Pitched roof (hellend dak)
Current Typical Rc (pre‑2019, m²·K/W): 1.5 – 2.5
Recommended Rc After Renovation: ≥ 6.0 (7.0 ideal)
Priority: Very high
Building Component: Flat roof (plat dak)
Current Typical Rc (pre‑2019, m²·K/W): 1.5 – 2.5
Recommended Rc After Renovation: ≥ 6.0
Priority: Very high
Building Component: Cavity wall (spouwmuur)
Current Typical Rc (pre‑2019, m²·K/W): 0.5 – 1.5 (empty or partial)
Recommended Rc After Renovation: ≥ 4.5 (5.0 recommended)
Priority: Very high
Building Component: Solid wall (massieve muur, pre‑1920)
Current Typical Rc (pre‑2019, m²·K/W): 0.3 – 0.6
Recommended Rc After Renovation: ≥ 3.5 interior or exterior insulation
Priority: High
Building Component: Ground floor (begane grondvloer)
Current Typical Rc (pre‑2019, m²·K/W): 0.5 – 1.3
Recommended Rc After Renovation: ≥ 3.5 (5.0 with crawl space insulation)
Priority: High
Building Component: Glazing (glas + kozijn)
Current Typical Rc (pre‑2019, m²·K/W): U 2.8 – 3.2 W/m²·K (single/old double)
Recommended Rc After Renovation: U ≤ 1.1 (HR++), preferably ≤ 0.9 (triple)
Priority: Very high
2.1 Roof Insulation
Because warm air rises, the roof is responsible for up to 30% of total heat loss in an uninsulated home. In Dutch renovation practice, two main scenarios exist:
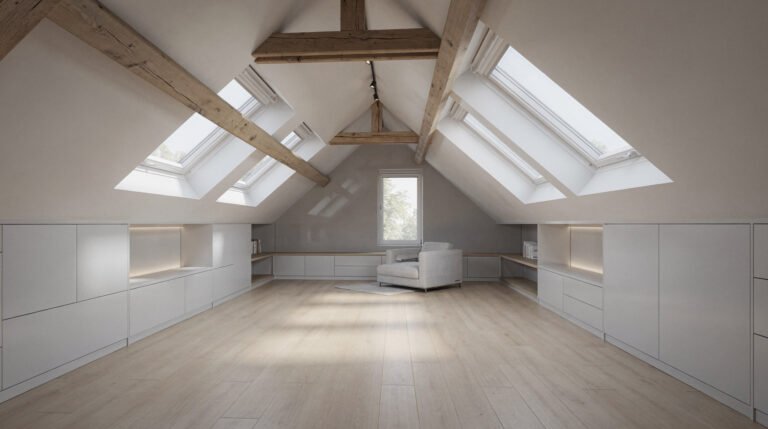
Pitched roof with an accessible attic: The most cost‑effective method is insulating from the inside by fitting insulation boards or glass wool between and under the rafters. Using PIR (polyisocyanurate) boards with a lambda value of 0.022 W/m·K, an Rc of 6.0 requires only about 13 cm of insulation thickness. If choosing glass wool (lambda ≈ 0.035), you will need around 21 cm. Always install a vapour‑control layer on the warm side to prevent condensation. If the attic space is used as a living area, you often build a voorzetwand with insulation and plasterboard. If it is a cold storage attic, insulating the attic floor is more practical and cheaper.
Flat roof: Flat roofs are usually upgraded externally by applying a warm‑roof construction (insulation on top of the waterproofing, or more commonly now, on top of the existing roof structure with new waterproofing). PIR boards of 12–14 cm achieve Rc 6.0. Because flat roofs also suffer from thermal bridging at the edges, pay special attention to the perimeter insulation. A complete flat‑roof renovation also presents the perfect moment to install extensive green‑roof layers, which improve thermal performance even further and are subsidised in many Dutch municipalities.
2.2 Wall Insulation
Cavity wall insulation (spouwmuurisolatie): The vast majority of pre‑2019 Dutch houses have cavity walls. If the cavity is still empty and at least 5–6 cm wide, filling it with EPS beads, glass wool flakes, or mineral wool is one of the quickest and most cost‑effective upgrades available. The Rc achieved depends on the material and cavity width; a 6 cm cavity filled with EPS (λ 0.033) yields an Rc of roughly 1.8 m²·K/W. While that may not reach the ideal 4.5 on its own, it cuts heat loss dramatically and should be combined with other measures. If you need to reach higher values, consider additional interior insulation (voorzetwand) or, where possible, exterior insulation with a new façade.
Solid walls: Homes built before 1920 often have single‑leaf solid brick walls. External insulation using a system such as a gevelisolatieplaat with render (buitengevelisolatie) is the best solution because it avoids losing interior floor space and keeps the thermal mass of the wall inside. An Rc of 4.5 typically requires 12–14 cm of EPS or stone wool. Interior insulation is an alternative but must be executed with great care to prevent interstitial condensation.
2.3 Floor Insulation
Dutch ground floors often feature a wooden floor on bearer beams above a crawl space. Insulating the crawl space is highly effective. Commonly, the bottom of the crawl space is covered with a layer of EPS beads or reflective insulation sheets (“bodemisolatie”), and the floor itself is insulated from above or below. For a wooden floor, applying mineral wool between the joists to achieve Rc 3.5–5.0 not only reduces heat loss but also eliminates cold drafts around your feet. An insulated floor directly improves the performance of underfloor heating, which you will likely install later. If the crawl space is high enough, insulating the crawl‑space ceiling (above the soil) is a good method; otherwise, floor insulation from above (during a complete floor renovation) is preferred.
2.4 High‑Performance Glazing
Windows are critical. Upgrading from single or old double glazing to HR++ (U ≈ 1.1 W/m²·K) reduces heat loss through the glass by 50–60%. For maximum compatibility with a low‑temperature system and improved comfort, consider triple glazing (U ≤ 0.8). Triple glazing not only keeps the interior glass surface warmer – eliminating cold drafts and condensation – but also allows the heat pump to operate at an even lower flow temperature. When replacing windows, also check the frames; old wooden or metal frames without thermal breaks can create cold bridges. Modern kozijnen with low U‑values and triple‑seal gaskets dramatically improve airtightness.
3. Airtightness and Controlled Ventilation
A well-insulated home must also be airtight to stop warm air escaping and cold air entering through gaps and cracks. In Dutch renovation, airtightness is expressed as the qv;10 value: the air infiltration rate at a 50 Pa pressure difference. For a heat pump ready home, aim for a qv;10 of no more than 1.0 dm³/s per m² of envelope area, or 0.6 for passive-house levels. This requires careful sealing of:
- Window and door frames to the wall.
- Joints between the roof and walls.
- Penetrations for pipes, cables, and ventilation ducts.
- The crawl space access hatch (luik).
- Top‑floor ceiling connections.
Use durable tapes, liquid‑applied membranes, and purpose‑made gaskets. After sealing, a blower door test identifies any remaining leaks. Bear in mind that increasing airtightness without a proper ventilation strategy is dangerous. This is where controlled ventilation steps in.
The best match for a heat pump ready home is balanced ventilation with heat recovery (systeem D, WTW). It extracts stale air from kitchens, bathrooms, and toilets, passes it through a high-efficiency heat exchanger (rendement ≥ 90%), and pre-warms incoming fresh air before delivering it to living rooms and bedrooms. In winter, the fresh air enters close to room temperature, sharply reducing ventilation heat loss – essential for low-energy operation. If retrofitting ducts is too invasive, a demand-controlled mechanical exhaust system (systeem C with CO₂-sensors) is the next-best option, though it still exhausts pre-heated air. Natural ventilation (roosters) alone is not suitable in a heat pump ready home; it defeats the purpose.
4. Low‑Temperature Heat Distribution System
Even the best‑insulated building envelope cannot compensate for a heating system that still requires high supply temperatures. The core principle of heat pump readiness is to design the heat emitters so that they can maintain 20 °C indoors with a supply temperature of 45 °C or less, even on the coldest days (‑10 °C outside).
4.1 Radiator Assessment and Upgrades
Radiators are sized for a design supply/return temperature (e.g., 75/65 °C). Lowering the supply temperature to 45 °C reduces their heat output by 50–65% depending on the type. A quick rule: a standard panel radiator type 21 (single‑panel with single convector fins) loses roughly half its output when going from 75/65/20 to 45/40/20. For example, a 2 m × 0.6 m radiator that delivers 2.0 kW at high temperature might only deliver 1.1 kW at low temperature. Therefore, to compensate, you must either oversize radiators (choose larger, taller, or thicker models) or install low‑temperature convectors (ventilatorconvectoren) that use small fans to boost heat output at low water temperatures. The table below compares typical outputs.
Radiator Type: Type 21
Dimensions (H×L×D, mm): 600 × 2000 × 100
Output at 75/65/20 (W): ~2,150
Output at 45/40/20 (W): ~1,050
Notes: Needs replacement or expansion for low‑temp
Radiator Type: Type 33 (drie‑plaat)
Dimensions (H×L×D, mm): 600 × 2000 × 155
Output at 75/65/20 (W): ~3,500
Output at 45/40/20 (W): ~1,900
Notes: Can often suffice for small rooms
Radiator Type: Low‑temp convector (Jaga type)
Dimensions (H×L×D, mm): per unit, various
Output at 75/65/20 (W): Not specified
Output at 45/40/20 (W): ~2,000–2,800
Notes: Contains fan, requires electricity
Before deciding, perform a room‑by‑room heat loss calculation (warmteverliesberekening) based on your upgraded insulation values. Use the software tool ISSO 51 or consult an installer. This will tell you exactly which radiators to replace, and what size and type to install.
4.2 Underfloor Heating: The Ideal Partner
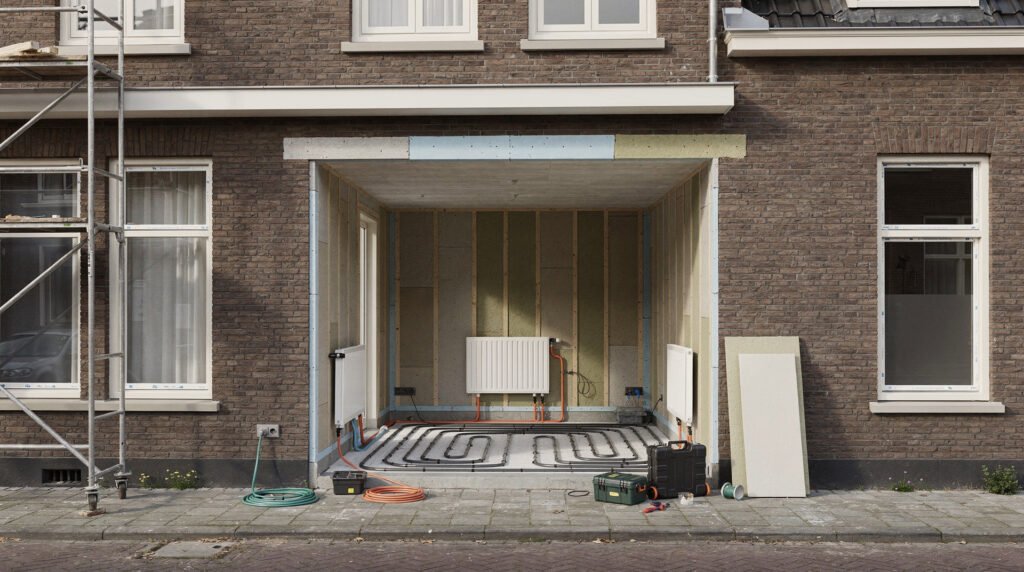
Underfloor heating (vloerverwarming) is the best heat emitter for a heat pump because it operates at supply temperatures as low as 30–35 °C and covers the entire floor area, creating uniform heat distribution. In ground‑floor renovations, a wet system embedded in a new screed over thick insulation (at least Rc 3.5 under the pipes) transforms the concrete slab into a large thermal store. For upper floors or retrofits where building up height is problematic, “droogbouw” systems – insulation boards with milled channels for pipes, topped with gypsum fibre boards – add only 30–50 mm and work with 16 mm pipes. Although the response time is quicker, the heat storage capacity is lower. Nevertheless, they allow you to run the heat pump at its most efficient, low‑temperature regime. Pair floor heating with individual room thermostats and weather‑compensation control to optimise energy use.
5. Domestic Hot Water Preparation
Pre‑2019 Dutch homes almost always rely on a combi‑boiler that heats water instantaneously. A heat pump cannot replicate this without a storage buffer. The heat pump ready home needs a hot water cylinder (boilervat) sized appropriately for the household. A family of four typically needs a 200–300 litre cylinder, heated once or twice a day by the heat pump to about 55 °C (and boosted weekly to 60 °C against legionella). The cylinder must be well‑insulated (standby loss ≤ 1.5 kWh/day). This means you must designate space – usually in a utility room, cellar, or integrated inside the indoor unit – for a cylinder approximately 1.8 m tall and 0.6 m in diameter. Compact split heat pumps often combine the hydraulic module and a 180‑litre tank in one cabinet, making installation easier. Ensure that hot water pipes are short and insulated to minimise waiting times and heat loss.
6. Electrical Infrastructure and Space Requirements
Heat pumps draw significant electrical power, especially when the backup electric heater (element) runs during peak defrost or very cold days. A typical air-to-water heat pump needs a dedicated three-phase (3×400 V) connection of at least 3×25 A, or 3×35 A for larger outputs. Many pre-2019 Dutch homes still have a single-phase 35 A connection. Have a qualified electrician check your meterkast: you may need a 3-phase supply (aanvraag netbeheerder) and a heavier main circuit breaker. The heat pump also requires a separate group in the fuse box with an earth-leakage circuit breaker (aardlekschakelaar).
Space for the outdoor unit must comply with local regulations regarding noise. The unit should be placed on a stable, vibration‑damped base, away from neighbours’ bedrooms. Allow at least three metres free air discharge to prevent recirculation. The indoor unit (buffervat, pump, valves) needs a frost‑free location with enough room for maintenance. A typical monobloc system has the electric backup heater and controls inside; a split system houses the refrigerant circuit outdoors and a compact hydrobox indoors. Plan enough space in your technical room.
7. Financial Considerations and Subsidies
Renovating a pre-2019 home to heat pump ready standard is a significant investment, but Dutch government incentives can reduce the net cost. The Investeringssubsidie duurzame energie en energiebesparing (ISDE) offers a direct contribution when purchasing a heat pump, often €500 to €3,000 depending on type and capacity. Since 2023, the ISDE also covers insulation measures if two or more are carried out simultaneously (e.g., roof and wall insulation) – or sometimes a single measure if the home’s energy label is E, F, or G. The subsidy per square metre of insulated surface varies: roughly €30/m² for roof insulation, €20/m² for walls, and €40/m² for glass (check current rates).
Many municipalities offer additional subsidies via the Nationaal Isolatieprogramma or local energy coaches. Combining subsidies can cover a large portion of the material costs. Financing options such as the Energiebespaarlening (a low-interest loan from the Nationaal Warmtefonds) are also available to homeowners. For the heat pump itself, the ISDE provides a bonus if you replace a gas boiler with a heat pump and insulate heavily. Keep your invoices and commissioning reports, and submit the application in time. The investment lowers monthly energy bills and lifts the energy label – homes with label A or higher are more valuable and sell faster.
8. Step-by-Step Renovation Checklist
Use the following checklist to track your progress. Work from top to bottom, as each step builds on the previous one.
Step: 1
Action: Perform an energy audit (energie‑advies) or heat‑loss calculation
Key Indicator / Target: Full warmteverliesberekening per room (ISSO 51)
Status: Not specified
Step: 2
Action: Upgrade roof insulation
Key Indicator / Target: Rc ≥ 6.0 m²·K/W
Status: Not specified
Step: 3
Action: Insulate walls (cavity or external/internal)
Key Indicator / Target: Rc ≥ 4.5 m²·K/W
Status: Not specified
Step: 4
Action: Insulate ground floor and/or crawl space
Key Indicator / Target: Rc ≥ 3.5 m²·K/W (floor)
Status: Not specified
Step: 5
Action: Replace glazing and install HR++ or triple glass + insulated frames
Key Indicator / Target: U ≤ 1.1 (glass), Uframe ≤ 1.5
Status: Not specified
Step: 6
Action: Seal all air leaks; execute a blower door test
Key Indicator / Target: qv;10 ≤ 1.0 dm³/s·m²
Status: Not specified
Step: 7
Action: Install a balanced ventilation system with heat recovery (systeem D)
Key Indicator / Target: WTW rendement ≥ 90%
Status: Not specified
Step: 8
Action: Adapt heat distribution: replace or add low‑temperature radiators/convectors, or install underfloor heating
Key Indicator / Target: Design supply temp ≤ 45 °C at Ta = -10 °C
Status: Not specified
Step: 9
Action: Select and size a domestic hot water cylinder
Key Indicator / Target: 200–300 L, standby ≤ 1.5 kWh/d
Status: Not specified
Step: 10
Action: Upgrade electrical meter cabinet to 3‑phase if needed
Key Indicator / Target: 3×25 A (or higher) dedicated group
Status: Not specified
Step: 11
Action: Choose a heat pump (air/water or ground source) with the correct output
Key Indicator / Target: Output matches calculated heat load at -7 °C
Status: Not specified
Step: 12
Action: Install and commission the heat pump, fine‑tune the heating curve
Key Indicator / Target: Seasonal COP monitored ≥ 3.8
Status: Not specified
Practical Tips for a Successful Heat Pump Ready Renovation
- Start with a professional energy audit. A certified energy advisor (EPA‑certified) will map your home’s exact deficiencies and advise which measures yield the fastest return. Do not skip this step; it will save you from expensive mistakes.
- Combine works to minimise disruption. Plan to insulate the roof and walls, replace windows, and install ventilation ducting in one major renovation phase. This often qualifies for higher subsidy amounts and reduces labour costs.
- Prioritise insulation over heat pump purchase. Some homeowners rush to buy a heat pump while still having single glazing. This is counterproductive. Insulate first, then calculate the smaller heat pump you need – you might even reduce the required capacity by 30–40%, lowering the upfront equipment cost.
- Ensure a continuous airtight layer. When insulating internally, always overlap the vapour barrier and tape all seams to the window frames and floor. Pay special attention to the connection between the roof insulation and the wall insulation to avoid thermal bypasses.
- Do not underestimate the noise factor. Place the outdoor unit where noise will not disturb neighbours. In a rijtjeshuis, a quiet unit (sound power ≤ 55 dB(A)) mounted on a wall bracket with anti‑vibration dampers is essential. Check gemeente regulations regarding noise limits at the property boundary.
- Use weather‑compensated control. A heat pump’s efficiency soars when the supply temperature is adjusted based on outdoor temperature. Install outdoor‑temperature sensors and set the heating curve as low as comfort allows.
- Apply for subsidies immediately. The ISDE works on a first‑come, first‑served basis and budgets can be exhausted. Gather all quotes and technical datasheets before installation, and submit the application as soon as the work is commissioned.
- Keep detailed documentation. Save all insulation thickness proofs, material certificates, and the commissioning report of the heat pump. These are required for subsidy claims and increase your home’s resale value by proving the energy performance improvements.
Conclusion
Making a pre-2019 Dutch home heat pump ready is a step-by-step process that turns an aging, gas-dependent house into a comfortable and energy-efficient one. By upgrading insulation, airtightness, ventilation, and heat distribution in sequence, you create the low-temperature conditions a heat pump needs to perform well. The checklist in this article gives you a clear order of work: audit, insulate, seal, ventilate with heat recovery, adapt your emitters, and only then install the heat pump. The investment is significant, but Dutch subsidies, lower energy bills, higher property value, and a reduced carbon footprint make it a worthwhile renovation.